GTM is a very useful tool for those without programming knowledge. Besides being quite intuitive, we will have at hand a lot of information that will make the use of this tool easier. However, I would like to share some tips that I have been collecting in the last months and that have become very useful when it comes to implement analytics through GTM.
Evaluate how many containers we need when working on different domains or subdomains
Despite GTM containers allow us to work with several domains, this does not mean that the best option is to have just one.
Before deciding to add one or more containers, we must value the similarities of what we will measure among those domains and subdomains. How many different triggers should we include? Think that with each new trigger there will be another tag to create or modify. Besides the headaches you may have working with many tags, the Google Tag Manager container has a maximum capacity. And, what is worse: the bigger, the more amount of resources to download so the load time will increase too.
On the other hand, it can be very frustrating to work with a different container for each domain or subdomain if they have similar metrics, as we will have to add the same tags, variables and triggers in each of them. And yes, despite having the chance to export and import our container, or even to copy and paste all the GTM elements by using Chrome extensions such as “GTM Copy Paste”, it is quite probable that at any given moment we think about why we do not use a single container from the very beginning.
Having said that, before deciding if we will create one or more containers, remember to share with the rest of the team what will be measure on each site. If metrics will be the same or very similar, a single container will be enough. If this is not the case, remember to create one for each domain and subdomain you may have.
Set Google Analytics with a variable defined by the user
As you may already know, each time you create a “Google Analytics: Universal Analytics” tag, you must add the correspondant UA (in other words, the ID tracking code for that property in Analytics). And this can be a real nightmare for those working with many tags! However, Google Tag Manager brings us the chance to create a custom variable for a faster and safer setting.
So, before adding any Google Analytics tag, remember to asign a new variable in your list of “User custom variables”. When doing this, choose the option “Google Analytics Setting” and add the UA and those settings you may find necessary.
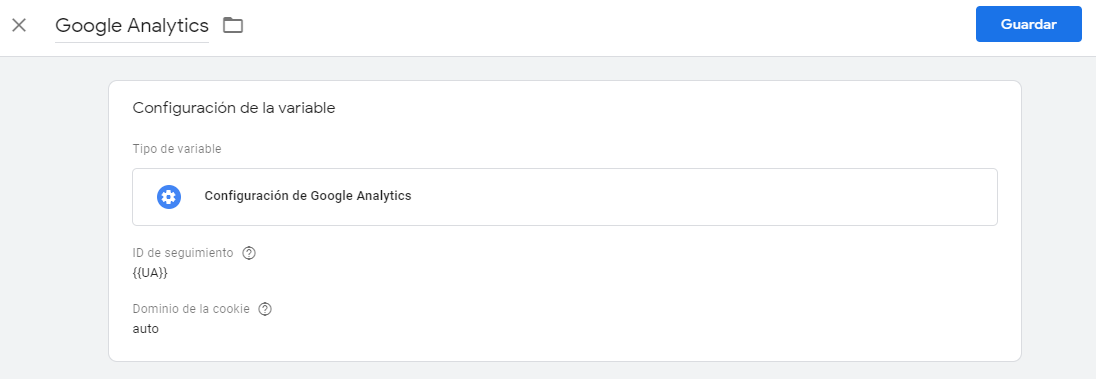
By doing the implementation this way, you will avoid having to set each “Universal Analytis” tag separately.
On the other hand, and related to this, I would like to add some notes about this type of setting that you may find useful if you work with Google Optimize.
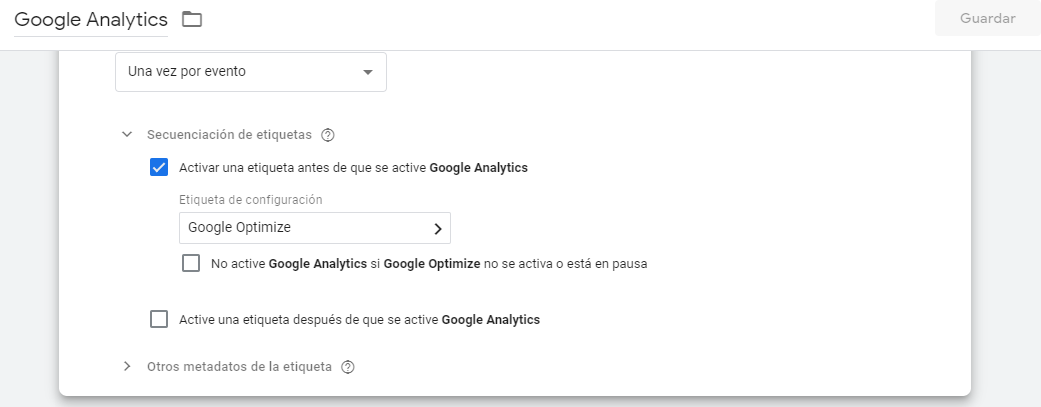
Having your tags set with the Google Analytics variable mentioned before, I found myself unable to start an A/B Test using Optimize.
If you also receive a warning that Google Analytics and Optimize settings do not match, remember to do this: go to your GTM container and check the Google Analytics tag created for the pageviews metric. You will see a section called “Tag Sequencing” in “Advanced Settings”. Check the option “Fire a tag before Google Analytics fires” and select Google Optimize. This will solve the problem.
Collect the same information in different Google Analytics properties
Maybe the first thing that comes to your mind when adding two or more properties to your Google Tag Manager container is to duplicate the Google Analytics tags, so each copy has the tracking ID of the second property.
Despite this method is correct, the fact of having to duplicate each of these tags can be a waste of time, specially if we are talking about a big amount. That is why I find interesting to add to this post a more efficient proposal made by Simo Ahava, to avoid the automatic task of duplicating tags and modify their UA.
The first thing we should do is to create a custom Javascript variable and add the following code, with the UA from the second property where we want to collect the data:
function() {
// Replace newTrackingId value with the UA property to which you want to duplicate this tag
var newTrackingId = ‘UA-XXXXXXXXX-1’;
var globalSendTaskName = ‘_’ + newTrackingId + ‘_originalSendTask’;
return function(customModel) {
window[globalSendTaskName] = window[globalSendTaskName] || customModel.get(‘sendHitTask’);
customModel.set(‘sendHitTask’, function(sendModel) {
var hitPayload = sendModel.get(‘hitPayload’);
var trackingId = new RegExp(sendModel.get(‘trackingId’), ‘gi’);
window[globalSendTaskName](sendModel);
sendModel.set(‘hitPayload’, hitPayload.replace(trackingId, newTrackingId), true);
window[globalSendTaskName](sendModel);
});
};
}
Remember to name the variable so it can be easy, both for you and the rest of your team, to know the type of information it collects.
Once this variable is created, we will edit the Google Analytigs tags we want to collect in those different properties. In order to do this, go to the “More settings” section > “Fields to set”. We will asign a name to the field and add as a value the Javascript variable created at the beginning.
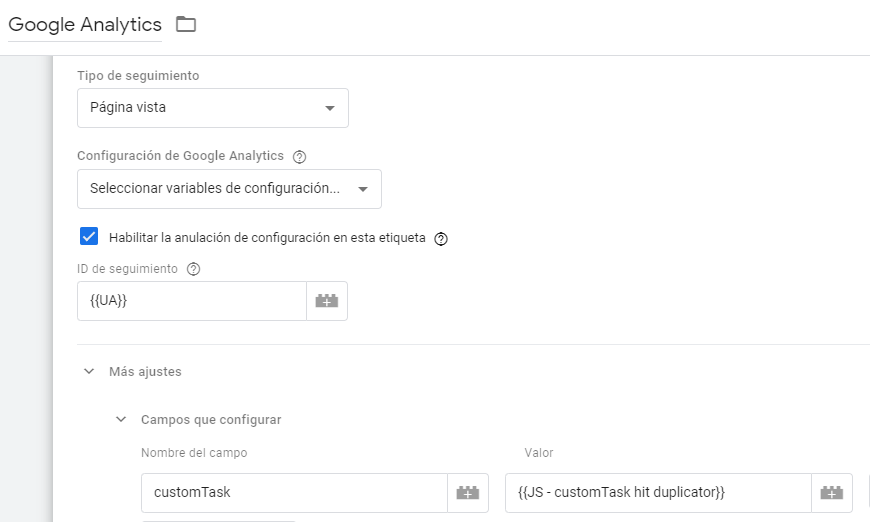
This way we can add this information to the different Analytics properties on just two steps. A much faster and simpler way than with the other alternative, right?